
Difference between revisions of "Autolathe"
From Unofficial Stationeers Wiki
Murph Dog99 (talk | contribs) m (Fixes to the way the expand buttons for recipe and data tables were positioned. where it was previously at first glance it seemed there was no data there (because it happened to me at one point) so i fixed it) |
(→Description) |
||
| (31 intermediate revisions by 17 users not shown) | |||
| Line 1: | Line 1: | ||
| − | + | [[Category:Fabricators]] | |
| − | + | [[Category:Import/Export]] | |
| − | |||
| − | [[Category: | ||
{{Itembox | {{Itembox | ||
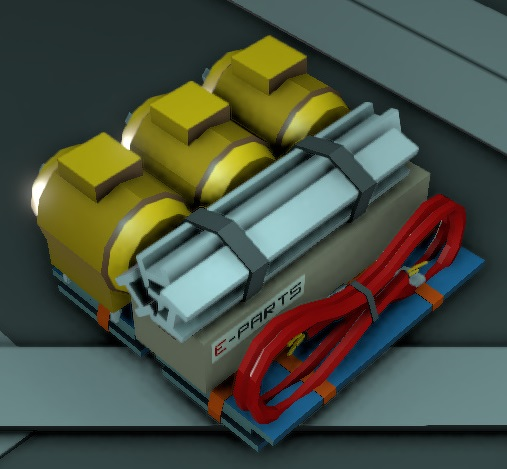
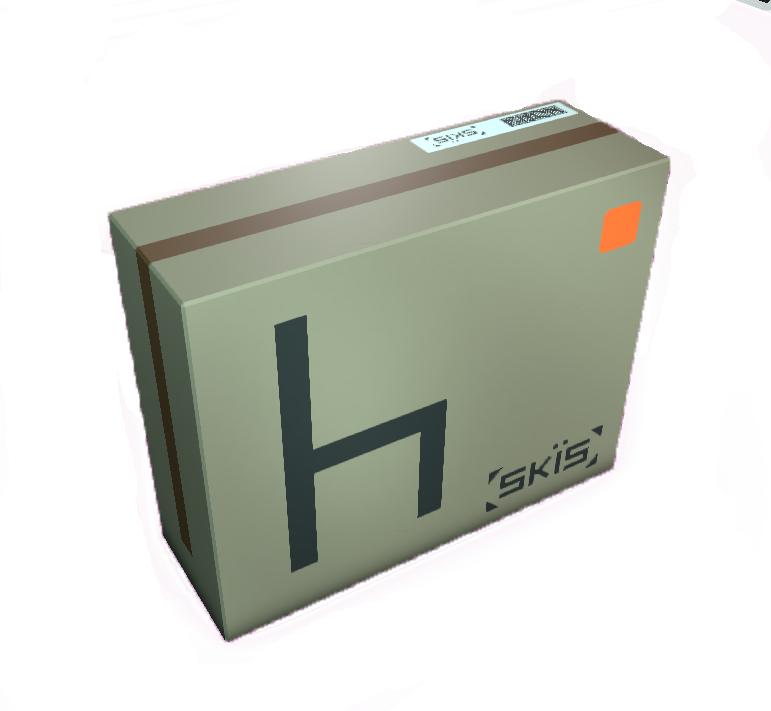
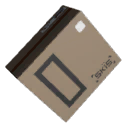
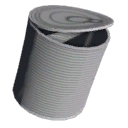
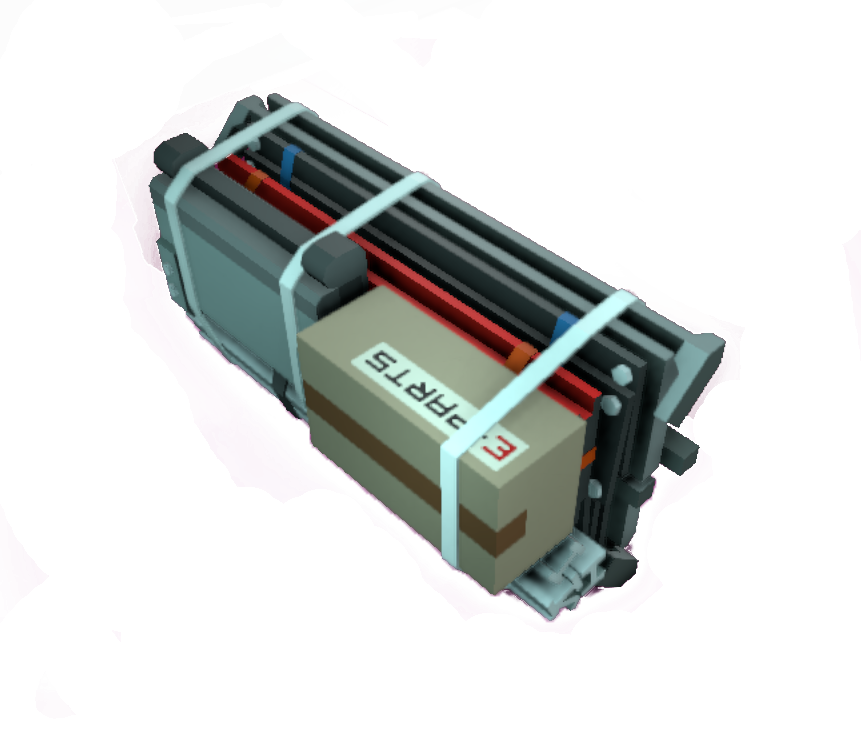
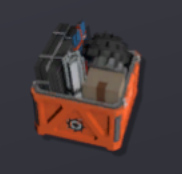
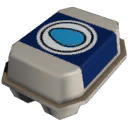
| − | + | | name = Kit (Autolathe) | |
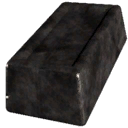
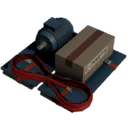
| − | + | | image = [[File:ItemKitAutolathe.png]] | |
| − | + | | prefabhash = -1753893214 | |
| − | + | | prefabname = ItemKitAutolathe | |
| + | | stacks = 1 | ||
| + | | slot_class = SlotClass.None | ||
| + | | sorting_class = SortingClass.Kits | ||
| + | | recipe_machine1 = Autolathe | ||
| + | | recipe_cost1 = 20g [[Iron]], 2g [[Gold]], 10g [[Copper]] | ||
| + | | constructs = [[Autolathe]] | ||
}} | }} | ||
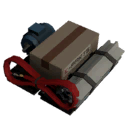
{{Structurebox | {{Structurebox | ||
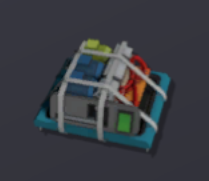
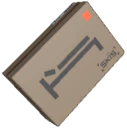
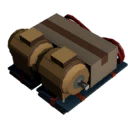
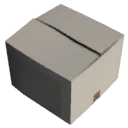
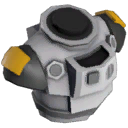
| − | + | | name = Autolathe | |
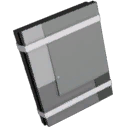
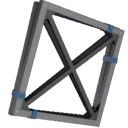
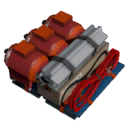
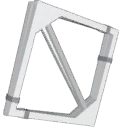
| − | + | | image = [[File:StructureAutolathe_BuildState4.png]] | |
| − | + | | prefab_hash = 336213101 | |
| − | + | | prefab_name = StructureAutolathe | |
| − | + | | power_usage = 100W | |
| − | + | | placed_on_grid = Small Grid | |
| − | + | | decon_with_tool1 = [[Wrench]] | |
| + | | placed_with_item = [[Kit (Autolathe)]] | ||
| + | | item_rec1 = [[Kit (Autolathe)]] | ||
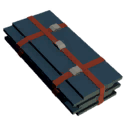
| + | | decon_with_tool2 = [[Angle Grinder]] | ||
| + | | const_with_tool1 = [[Welding Torch]] | ||
| + | | const_with_item1 = 2 x [[Iron Sheets]] | ||
| + | | item_rec2 = 2 x [[Iron Sheets]] | ||
| + | | decon_with_tool3 = [[Wire Cutters]] | ||
| + | | const_with_item2 = 4 x [[Cable Coil]] | ||
| + | | item_rec3 = 4 x [[Cable Coil]] | ||
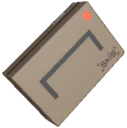
| + | | decon_with_tool4 = [[Angle Grinder]] | ||
| + | | const_with_tool3 = [[Welding Torch]] | ||
| + | | const_with_item3 = 2 x [[Plastic Sheets]] | ||
| + | | item_rec4 = 2 x [[Plastic Sheets]] | ||
| + | | decon_with_tool5 = [[Hand Drill]] | ||
| + | | const_with_tool4 = [[Screwdriver]] | ||
}} | }} | ||
{{Structurebox | {{Structurebox | ||
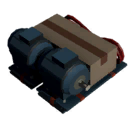
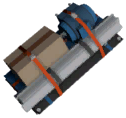
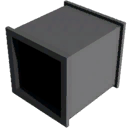
| − | + | | name = Autolathe (Tier Two) | |
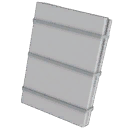
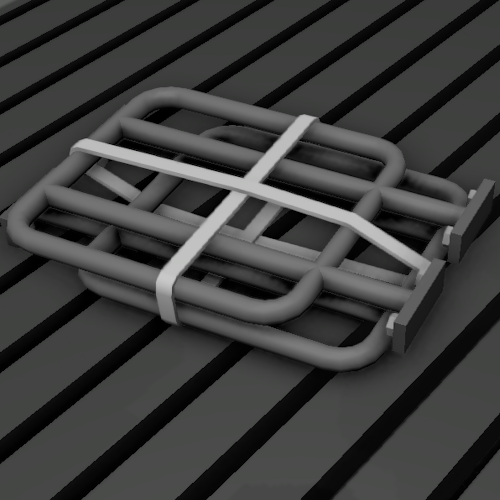
| − | + | | image = [[File:StructureAutolathe_BuildState5.png]] | |
| − | + | | prefab_hash = 336213101 | |
| − | + | | prefab_name = StructureAutolathe | |
| − | + | | power_usage = 100W + Recipe Usage | |
| − | + | | placed_with_item = [[Kit (Autolathe)]] | |
| − | + | | placed_on_grid = Small Grid | |
| − | + | | const_with_tool5 = [[Screwdriver]] | |
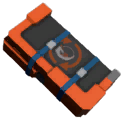
| + | | const_with_item5 = [[Autolathe Printer Mod]] | ||
| + | | item_rec6 = [[Autolathe Printer Mod]] | ||
| + | | decon_with_tool6 = [[Hand Drill]] | ||
| + | }} | ||
| + | |||
| + | == Description == | ||
| + | <div style="width:auto; overflow:auto; border-radius:10px; background-color:white;"><p style="margin:5px 0px 5px 10px;"><i>"The foundation of most [[Stationeers_(Faction)|Stationeer]] fabrication systems, the [[ExMin_(Faction)|ExMin]] autolathe is a multi-axis molecular compositional system. Its complexity demands considerable time to assemble, but it remains an indispensable creation tool. Upgrade the device using a [[Mod_Kit#Autolathe_Printer_Mod|Autolathe Printer Mod]] for additional recipes and faster processing speeds."</i><br><b>- Stationpedia</b></p></div> | ||
| + | |||
| + | Autolathe is a first and the most fundamental fabrication device available for stationeers. One kit for this device is provided with every drop pod, as it is impossible to establish the station and progress without using it. | ||
| + | |||
| + | Autolathe is used to produce all other fabrication and processing machinery kits, construction modules, and devices for storage, management, and automatic distrbution of items, as well as furniture and miscallenous utility items. | ||
| + | |||
| + | == Interfaces == | ||
| + | === Manual usage === | ||
| + | The <b>Autolathe</b> has three options for physical interaction. The first one is a small toggle with which you can power the fabricator. If the <b>Autolathe</b> is off the switch is red and if it's on it glows green. Then there is a pullable lever with the label "PURGE". If it is pulled it ejects all stored materials through the output as long as it isn't producing something at that point of time. Third is a big touchscreen which is only lit while the <b>Autolathe</b> is powered. On the touchscreen are four pressable buttons and one area for information. The green arrows pointing to the left and the right can be used to cycle to the previous/next recipe. Between the arrows is a button for starting and stopping the fabrication of the chosen item. In the lower left corner of the touchscreen you can use the button with the magnifying glass to open a searchable list of all possible recipes. Either use the search bar or scroll through the list and select the wanted item. Right next to it is a blue area where you can see all the materials inside of the <b>Autolathe</b> as long as you look at the blue area. | ||
| + | |||
| + | ==== Tips for manual usage ==== | ||
| + | If you want the <b>Autolathe</b> to create only one item but it has enough materials inside for another fabrication of the chosen item you can cycle to another recipe after starting the fabrication. This will result in the deactivation of the fabricator after the first item is finished. It doesn't matter if the recipe you cycle to also could be fabricated due to enough stored materials. | ||
| + | === Import/Export === | ||
| + | The <b>Autolathe</b> supports importing and exporting items. Both of those ports can be interacted by using [[Chutes]]. On the left side is the input which only accepts Ingots. The port on the right side is used for exporting fabricated items - which happens automatically - and the stored ingots. | ||
| − | == | + | === Cables === |
| − | + | The <b>Autolathe</b> has two connection points for cables. Standing in front of the machine the right port is for [[Power|power]] (indicated by a small red thunderbolt) and the left port is for the [[:Category:Data_Network|Data Network]] (indicated by three small green boxes). | |
| − | + | == Upgrade == | |
| + | The Autolathe can be upgraded from tier one to tier two by using an [[Mod_Kit#Autolathe_Printer_Mod|Autolathe Printer Mod]]. | ||
| − | + | == Versions/Tiers == | |
| − | + | <div class="mw-customtoggle-tiers" style="width:auto; overflow:auto; text-indent:10px; border: 2px solid #253C60; border-radius:10px;"><b>Click here to see/hide all the <span style="color:#E57125;">tiers</span></b></div> | |
| − | <div class=" | + | <div class="mw-collapsible mw-collapsed" id="mw-customcollapsible-tiers"><br>{{:Autolathe/Tiers}}</div> |
| − | |||
| − | |||
| − | <div class="mw-collapsible- | ||
| − | + | == Recipes == | |
| − | + | <div class="mw-customtoggle-recipes" style="width:auto; overflow:auto; text-indent:10px; border: 2px solid #253C60; border-radius:10px;"><b>Click here to see/hide all the <span style="color:#E57125;">recipes</span></b></div> | |
| − | + | <div class="mw-collapsible mw-collapsed" id="mw-customcollapsible-recipes"><br>{{:Autolathe/Recipes}}</div> | |
| − | |||
| − | |||
| − | |||
| − | |||
| − | |||
| − | |||
| − | |||
| − | |||
| − | |||
| − | |||
| − | |||
| − | |||
| − | |||
| − | |||
| − | |||
| − | |||
| − | |||
| − | |||
| − | |||
| − | |||
| − | |||
| − | |||
| − | |||
| − | |||
| − | |||
| − | |||
| − | |||
| − | |||
| − | |||
| − | |||
| − | |||
| − | |||
| − | |||
| − | |||
| − | |||
| − | |||
| − | |||
| − | |||
| − | |||
| − | |||
| − | |||
| − | |||
| − | |||
| − | |||
| − | |||
| − | |||
| − | |||
| − | |||
| − | |||
| − | |||
| − | |||
| − | |||
| − | |||
| − | |||
| − | |||
| − | |||
| − | |||
| − | |||
| − | |||
| − | |||
| − | |||
| − | |||
| − | |||
| − | |||
| − | |||
| − | |||
| − | |||
| − | |||
| − | |||
| − | |||
| − | |||
| − | |||
| − | |||
| − | |||
| − | |||
| − | |||
| − | |||
| − | |||
| − | |||
| − | |||
| − | |||
| − | |||
| − | |||
| − | |||
| − | |||
| − | |||
| − | |||
| − | |||
| − | |||
| − | |||
| − | |||
| − | |||
| − | |||
| − | |||
| − | |||
| − | |||
| − | |||
| − | |||
| − | |||
| − | |||
| − | |||
| − | |||
| − | |||
| − | |||
| − | |||
| − | |||
| − | |||
| − | |||
| − | |||
| − | |||
| − | |||
| − | </div> | ||
| − | <div class=" | + | == Data Network Properties == |
| − | + | <div class="mw-customtoggle-datanetworkproperties" style="width:auto; overflow:auto; text-indent:10px; border: 2px solid #253C60; border-radius:10px;"><b>Click here to see/hide all the <span style="color:#E57125;">data network properties</span></b></div> | |
| − | + | <div class="mw-collapsible mw-collapsed" id="mw-customcollapsible-datanetworkproperties"><br>{{:Autolathe/Data_Network}}</div> | |
| − | <div class="mw-collapsible- | ||
| − | + | == Internal Memory == | |
| − | + | <div class="mw-customtoggle-internalmemory" style="width:auto; overflow:auto; text-indent:10px; border: 2px solid #253C60; border-radius:10px;"><b>Click here to see/hide all the <span style="color:#E57125;">internal memory</span></b></div> | |
| − | + | <div class="mw-collapsible mw-collapsed" id="mw-customcollapsible-internalmemory"><br>{{:Autolathe/Internal_Memory}}</div> | |
| − | |||
| − | |||
| − | |||
| − | |||
| − | |||
| − | |||
| − | |||
| − | |||
| − | |||
| − | |||
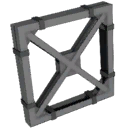
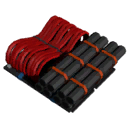
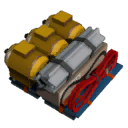
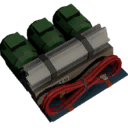
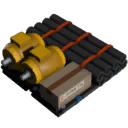
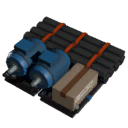
| − | + | == Build States == | |
| − | + | <div class="mw-customtoggle-buildstates" style="width:auto; overflow:auto; text-indent:10px; border: 2px solid #253C60; border-radius:10px;"><b>Click here to see/hide all the <span style="color:#E57125;">build states</span></b></div> | |
| − | + | <div class="mw-collapsible mw-collapsed" id="mw-customcollapsible-buildstates"><br>{{:Autolathe/Build_States}}</div> | |
| − | |||
| − | |||
| − | |||
| − | |||
| − | |||
| − | |||
| − | |||
| − | |||
| − | |||
| − | |||
| − | |||
| − | |||
| − | |||
| − | |||
| − | |||
| − | |||
| − | |||
| − | |||
| − | |||
| − | |||
| − | |||
| − | |||
| − | |||
| − | |||
| − | |||
| − | |||
| − | </div> | ||
| − | </div> | ||
== Bugs == | == Bugs == | ||
* Setting the "Activate" parameter to 1, can cause the Autolathe to activate, even when it is empty. Nothing is dropped from the output, once the production is finished in this case and the Autolathe will stop after one production run. | * Setting the "Activate" parameter to 1, can cause the Autolathe to activate, even when it is empty. Nothing is dropped from the output, once the production is finished in this case and the Autolathe will stop after one production run. | ||
| − | + | ||
| − | + | __NOTOC__ | |
Latest revision as of 08:37, 20 March 2025
 | |
| Constructing Options | Autolathe |
|---|---|
| Properties | |
| Stacks | No |
| Recipes | |
| Autolathe | 20g Iron, 2g Gold, 10g Copper |
| Logic | |
| Item Hash | -1753893214 |
| Item Name | ItemKitAutolathe |
| Logic Classes |
SlotClass.None SortingClass.Kits |
 | |
| Operation | |
|---|---|
| Power Usage | 100W |
| Prefab Hash | 336213101 |
| Prefab Name | StructureAutolathe |
| Construction | |
| Placed with | Kit (Autolathe) |
| Placed on | Small Grid |
| Stage 1 | |
| Next Stage Construction | |
| Constructed with tool | Welding Torch |
| Constructed with item | 2 x Iron Sheets |
| Deconstruction | |
| Deconstructed with | Wrench |
| Item received | Kit (Autolathe) |
| Stage 2 | |
| Next Stage Construction | |
| Constructed with item | 4 x Cable Coil |
| Deconstruction | |
| Deconstructed with | Angle Grinder |
| Item received | 2 x Iron Sheets |
| Stage 3 | |
| Next Stage Construction | |
| Constructed with tool | Welding Torch |
| Constructed with item | 2 x Plastic Sheets |
| Deconstruction | |
| Deconstructed with | Wire Cutters |
| Item received | 4 x Cable Coil |
| Stage 4 | |
| Next Stage Construction | |
| Constructed with tool | Screwdriver |
| Deconstruction | |
| Deconstructed with | Angle Grinder |
| Item received | 2 x Plastic Sheets |
| Stage 5 | |
| Deconstruction | |
| Deconstructed with | Hand Drill |
 | |
| Operation | |
|---|---|
| Power Usage | 100W + Recipe Usage |
| Prefab Hash | 336213101 |
| Prefab Name | StructureAutolathe |
| Construction | |
| Placed with | Kit (Autolathe) |
| Placed on | Small Grid |
| Stage 5 | |
| Next Stage Construction | |
| Constructed with tool | Screwdriver |
| Constructed with item | Autolathe Printer Mod |
| Stage 6 | |
| Deconstruction | |
| Deconstructed with | Hand Drill |
| Item received | Autolathe Printer Mod |
Description[edit]
"The foundation of most Stationeer fabrication systems, the ExMin autolathe is a multi-axis molecular compositional system. Its complexity demands considerable time to assemble, but it remains an indispensable creation tool. Upgrade the device using a Autolathe Printer Mod for additional recipes and faster processing speeds."
- Stationpedia
Autolathe is a first and the most fundamental fabrication device available for stationeers. One kit for this device is provided with every drop pod, as it is impossible to establish the station and progress without using it.
Autolathe is used to produce all other fabrication and processing machinery kits, construction modules, and devices for storage, management, and automatic distrbution of items, as well as furniture and miscallenous utility items.
Interfaces[edit]
Manual usage[edit]
The Autolathe has three options for physical interaction. The first one is a small toggle with which you can power the fabricator. If the Autolathe is off the switch is red and if it's on it glows green. Then there is a pullable lever with the label "PURGE". If it is pulled it ejects all stored materials through the output as long as it isn't producing something at that point of time. Third is a big touchscreen which is only lit while the Autolathe is powered. On the touchscreen are four pressable buttons and one area for information. The green arrows pointing to the left and the right can be used to cycle to the previous/next recipe. Between the arrows is a button for starting and stopping the fabrication of the chosen item. In the lower left corner of the touchscreen you can use the button with the magnifying glass to open a searchable list of all possible recipes. Either use the search bar or scroll through the list and select the wanted item. Right next to it is a blue area where you can see all the materials inside of the Autolathe as long as you look at the blue area.
Tips for manual usage[edit]
If you want the Autolathe to create only one item but it has enough materials inside for another fabrication of the chosen item you can cycle to another recipe after starting the fabrication. This will result in the deactivation of the fabricator after the first item is finished. It doesn't matter if the recipe you cycle to also could be fabricated due to enough stored materials.
Import/Export[edit]
The Autolathe supports importing and exporting items. Both of those ports can be interacted by using Chutes. On the left side is the input which only accepts Ingots. The port on the right side is used for exporting fabricated items - which happens automatically - and the stored ingots.
Cables[edit]
The Autolathe has two connection points for cables. Standing in front of the machine the right port is for power (indicated by a small red thunderbolt) and the left port is for the Data Network (indicated by three small green boxes).
Upgrade[edit]
The Autolathe can be upgraded from tier one to tier two by using an Autolathe Printer Mod.
Versions/Tiers[edit]
Recipes[edit]


Data Network Properties[edit]
Internal Memory[edit]
Build States[edit]


Bugs[edit]
- Setting the "Activate" parameter to 1, can cause the Autolathe to activate, even when it is empty. Nothing is dropped from the output, once the production is finished in this case and the Autolathe will stop after one production run.