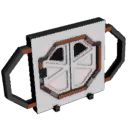
Airlock (Structure)
From Unofficial Stationeers Wiki
 | |
| Operation | |
|---|---|
| Power Usage | 25W |
| Prefab Hash | -2105052344 |
| Prefab Name | StructureAirlock |
| Construction | |
| Placed with | Kit (Airlock) |
| Placed on | Small Grid |
| Stage 1 | |
| Next Stage Construction | |
| Constructed with tool | Welding Torch |
| Constructed with item | 2 x Steel Sheets |
| Deconstruction | |
| Deconstructed with | Wrench |
| Item received | Kit (Airlock) |
| Stage 2 | |
| Next Stage Construction | |
| Constructed with tool | Crowbar |
| Constructed with item | 2 x Plastic Sheets |
| Deconstruction | |
| Deconstructed with | Hand Drill |
| Item received | 2 x Steel Sheets |
| Stage 3 | |
| Deconstruction | |
| Deconstructed with | Angle Grinder |
| Item received | 2 x Plastic Sheets |
Contents
Description[edit]
The standard airlock is a powered portal that forms the main component of an airlock chamber. As long as the airlock is not locked, it can be manually opened using a crowbar.
- Stationpedia
Guide (Airlock) provides additional information regarding the function, construction, and operation of airlocks.
Characteristics[edit]
- It can withstand a Pressure differential of 1MPA.
- It consumes 25W of Power per Tick.
- It has a separate Power Port and Data Port.
- It has a keypad on both sides.
- It has indicator lights.
- If unlocked, it can be manually operated using a Crowbar regardless of its power state.
- If enslaved by a regular or a advanced airlock circuit, it cannot be operated manually.
User Interface[edit]
An Airlock provides the following user interface:
| Name | Type | Function |
|---|---|---|
| Keypad | Keypad | Opens or closes the door as long as it has power |
| Lock | Indicator | Turns red when locked and green when unlocked |
Settings[edit]
An Airlock has no settings.
Construction[edit]
An Airlock is constructed using 1 x Kit (Airlock), 2 x Steel Sheets, and 2 x Plastic Sheets.
You must first place the Kit (Airlock) by right clicking and selecting the unobstructed area. After the kit is placed, you will use a welding torch with 2 Steel Sheets in your other hand to complete stage 2. To finalize the airlock, you must use your crowbar with 2 Plastic Sheets in your other hand.
Deconstruction[edit]
An Airlock can be deconstructed in 3 stages. You will first use your angle grinder to take off the 2 x Plastic Sheets. You will then use your hand drill to remove the 2 x Steel Sheets. Finally to remove the airlock, you will use your wrench to receive the 1 x Kit (Airlock).
Data Network Properties[edit]
These are all Data Network properties of this device.
Data Parameters[edit]
These are all parameters that can be written with a Logic Writer, Batch Writer, or Integrated Circuit (IC10), and can be read with a Logic Reader, Batch Reader, or Integrated Circuit (IC10).
| Parameter Name | Data Type | Access | Value | Description | ||
|---|---|---|---|---|---|---|
| Power | Boolean | Read
|
0 | Unpowered | Can be read to return if the Airlock is correctly powered or not, set via the power system, return 1 if powered and 0 if not | |
| 1 | Powered | |||||
| Open | Integer | Read Write
|
||||
| Mode | Integer | Read Write
|
0 | Operate | The mode of the Airlock. | |
| 1 | Logic | |||||
| Lock | Boolean | Read Write
|
0 | Unlocked | Disable manual operation of the Airlock. | |
| 1 | Locked | |||||
| Setting | Integer | Read Write
|
||||
| On | Boolean | Read Write
|
0 | Off | The current state of the Airlock. | |
| 1 | On | |||||
| RequiredPower | Integer | Read
|
||||
| Idle | Integer | Read
|
||||
| PrefabHash | Integer | Read
|
||||
| ReferenceId | Integer | Read
|
||||
| NameHash | Integer | Read
|
||||
