Difference between revisions of "Custom Airlock IC10"
From Unofficial Stationeers Wiki
(created the page for a custom airlock) |
Emilgardis (talk | contribs) (Use proper/better category -> IC10) |
||
| (4 intermediate revisions by 3 users not shown) | |||
| Line 1: | Line 1: | ||
| + | [[Category:IC10 Programming]] | ||
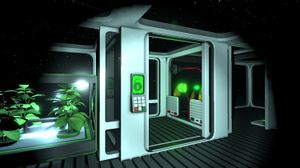
[[File:Airlockscreen.jpg|thumb]] | [[File:Airlockscreen.jpg|thumb]] | ||
| Line 13: | Line 14: | ||
= Assembly = | = Assembly = | ||
| − | + | Set up a standard airlock for atmosphere on both sides. Configure the pressures in the first two lines of the script. '''Before exporting the script or resetting the IC, make sure the airlock is cycled to the outside (inner door closed, outer open)'''. The LED serves as trigger for both cycling the airlock and skipping each phase, hence should be placed inside the airlock. The airlock should be a single frame to avoid leftover atmosphere after depressurization. For larger airlocks place the sensor on the far side from the vents. The script supports [[Blast Doors]], but since they lack a door handle you will need a button on each side (outside) of the airlock. Connect a [[Logic Writer]] to each button and use it to toggle the LED. | |
IC10 pin layout: | IC10 pin layout: | ||
| Line 34: | Line 35: | ||
The airlock can be cycled by interacting with either door, or turning the LED off. During cycling the doors are locked, and the LED can be used to skip both depressurize (red) and pressurize (yellow) phases. | The airlock can be cycled by interacting with either door, or turning the LED off. During cycling the doors are locked, and the LED can be used to skip both depressurize (red) and pressurize (yellow) phases. | ||
| + | |||
| + | [https://pastebin.com/62E7BfqY Source Code] | ||
{| class="mw-collapsible mw-collapsed" | {| class="mw-collapsible mw-collapsed" | ||
| Line 136: | Line 139: | ||
dePressurize_end:<br> | dePressurize_end:<br> | ||
s LedLight On 1<br> | s LedLight On 1<br> | ||
| + | yield<br> | ||
j ra<br> | j ra<br> | ||
<br> | <br> | ||
| Line 146: | Line 150: | ||
pressurize_end:<br> | pressurize_end:<br> | ||
s LedLight On 1<br> | s LedLight On 1<br> | ||
| + | yield<br> | ||
j ra<br> | j ra<br> | ||
<br> | <br> | ||
| Line 157: | Line 162: | ||
j _monitorTrigger<br> | j _monitorTrigger<br> | ||
monitorTrigger_end:<br> | monitorTrigger_end:<br> | ||
| + | yield<br> | ||
j ra<br> | j ra<br> | ||
|} | |} | ||
Latest revision as of 12:07, 23 May 2024
Contents[edit]
This script controls all functions of an airlock that consists of the following:
Assembly[edit]
Set up a standard airlock for atmosphere on both sides. Configure the pressures in the first two lines of the script. Before exporting the script or resetting the IC, make sure the airlock is cycled to the outside (inner door closed, outer open). The LED serves as trigger for both cycling the airlock and skipping each phase, hence should be placed inside the airlock. The airlock should be a single frame to avoid leftover atmosphere after depressurization. For larger airlocks place the sensor on the far side from the vents. The script supports Blast Doors, but since they lack a door handle you will need a button on each side (outside) of the airlock. Connect a Logic Writer to each button and use it to toggle the LED.
IC10 pin layout:
| D0 | Interior Door |
| D1 | Exterior Door |
| D2 | Interior Vent |
| D3 | Exterior Vent |
| D4 | Gas Sensor |
| D5 | LED Light |
Usage[edit]
The airlock can be cycled by interacting with either door, or turning the LED off. During cycling the doors are locked, and the LED can be used to skip both depressurize (red) and pressurize (yellow) phases.
| Source code: |
|---|
define Int.Pressure 100 |

